 how-to
Safe Way to Remove Lash Clusters: Step-by-Step
Table of Contents
- Why Proper Removal Protects Lash Health
- What You'll Need Before You Remove Lash Clusters
- Step-by-Step: The Safe Way to Remove Lash Clusters
- Choosing the Best Lash Cluster Remover for Your Routine
- How to Remove Lash Glue Residue Without Tugging
- Preventing Lash Damage From Clusters: Daily Habits That Help
- Common Mistakes to Avoid When Removing Lash Clusters
- Frequently Asked Questions
Last Updated: September 28, 2026
Why Proper Removal Protects Lash Health
The safe way to remove lash clusters starts with one simple rule: never pull. Ripping clusters off can tear out your natural lashes at the root. That damage can take weeks or months to grow back.
Here is what proper removal actually does:
- Keeps your natural lashes intact and full
- Reduces the risk of irritation and eye sensitivity
- Prevents residue buildup along the lash line
- Makes your next DIY extension set easier to apply
What You'll Need Before You Remove Lash Clusters
Gather your supplies first so you are not hunting for them mid-removal. A common mistake is starting with dry lashes and no remover on hand. That leads to tugging.
Here is your removal kit:
- An oil-based cleanser or a dedicated lash cluster remover
- Cotton pads or cotton swabs
- A small bowl of warm water
- A clean spoolie brush
- Micellar water for a final clean
- A soft towel or headband to keep hair back
Total Time: About 15 to 20 minutes Difficulty: Beginner
Step-by-Step: The Safe Way to Remove Lash Clusters
Removing lash clusters safely takes three stages: loosen, dissolve, and slide. Rushing any stage is what causes damage. Follow the steps in order.
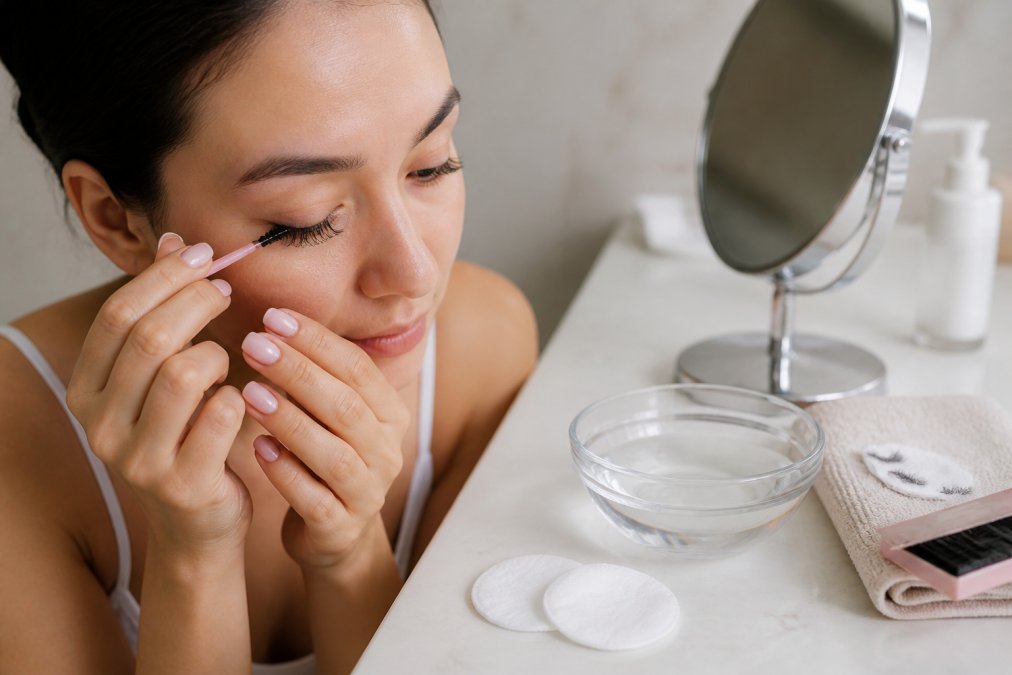
Step 1: Loosen Adhesive With Steam or Warm Compress
Steam softens the lash adhesive before you touch it. Heat weakens the bond so clusters release with less force.
Step 2: Apply an Oil-Based Remover or Cleanser
Oil breaks down most lash adhesives. Apply your oil-based cleanser or remover along the lash line with a cotton swab. Let it sit for the full soak time listed on the product, usually a few minutes.
Step 3: Slide Clusters Downward and Clean the Lash Line
Use a downward motion to slide each cluster off. Support the eyelid with one finger. If a cluster resists, add more remover and wait. Never force it.
Choosing the Best Lash Cluster Remover for Your Routine
The best lash cluster remover is one that matches your adhesive chemistry, your skin sensitivity, and how much time you are willing to spend. There is no single winner for everyone, and the wrong pick is a common cause of irritation.
Here is how the main options actually work:
| Remover Type | How It Works | Best For | Watch Out For |
|---|---|---|---|
| Oil-based cleanser | Oils penetrate the cured adhesive and weaken the bond over several minutes | Sensitive eyes, beginners | Oily residue that needs a second cleanse |
| Coconut or olive oil | Same oil mechanism, slower because the fatty acid chain is heavier | Budget setups, very gentle removal | Soak time can run 10+ minutes |
| Cream or gel remover | Solvent held in a cream base so it stays where you put it | Precise application, stubborn bonds | Higher cost, longer working time |
| Dedicated adhesive solvent | Formulated specifically to break cyanoacrylate bonds | Bond-and-seal products, stuck clusters | Stronger formula, patch test essential |
| Micellar water | Lifts surface residue only | Final cleanup | Not strong enough to break a bond on its own |
How to Remove Lash Glue Residue Without Tugging
Stubborn lash glue residue is the number one reason people tug at their lash line. The fix is patience and a graduated approach, not force. Residue usually sits in small clumps where the adhesive pooled, and those clumps release in stages.
The graduated residue protocol
Work through these stages in order. Stop as soon as the residue lifts.
- Soak. Saturate a cotton pad with oil-based cleanser and press it against the closed eye for one to two minutes. Do not wipe yet, let the oil penetrate.
- Wipe downward. With light pressure only, wipe from the lash line toward the cheek. One pass, then check.
- Re-soak. If residue remains, apply fresh cleanser and wait another two minutes. Repeat up to three rounds.
- Target the clump. For a single stubborn clump, hold a cotton swab soaked in remover against it for 30 seconds before wiping.
- Stop for the day. If three rounds do not clear it, stop. Try again tomorrow. Your lash line needs a break more than it needs a perfect clean.
How much pressure is too much
This is the part most guides skip. Use this as your gauge:
- Safe pressure: The cluster slides off with the weight of the cotton pad alone. You feel no pull at the root.
- Borderline: You feel a slight tug but the cluster releases. Stop, re-soak, and try again rather than continuing.
- Too much: You feel resistance at the lash root, the eyelid skin pulls with the cluster, or you see a natural lash bending before it releases. Stop immediately. Any of these means the adhesive is not fully dissolved.
If a cluster is truly stuck
Some clusters resist every round. Do not escalate to pulling. Instead:
- Leave the cluster in place and remove the others first.
- Apply remover and wait a full 10 minutes before touching it again.
- Try a different remover type, a cream or gel solvent often works where oil fails.
- If it still will not release after two days of attempts, book a professional removal. A technician has tools and solvents that are not sold for home use, and the cost of a removal is far less than the cost of losing a patch of natural lashes.
After the residue is gone: post-removal conditioning
Once the lash line is clean, your natural lashes need recovery time. This is the step that separates a set you can reapply in a week from one that leaves you with thin spots for a month.
- Cleanse gently. Each night for the first few days, wash the lash line with warm water and a soft cloth. No scrubbing.
- Condition. A light lash conditioner or a single drop of castor oil applied with a clean spoolie can help dry lashes feel softer. Use it sparingly, too much oil can clog the follicles.
- Skip mascara for 24 to 48 hours. Mascara on fragile lashes invites breakage during removal.
- Give a rest day. Leave your natural lashes bare for at least one day between sets. This is the single most effective habit for preventing long-term thinning.
Preventing Lash Damage From Clusters: Daily Habits That Help
Preventing lash damage from clusters comes down to daily habits, not just removal day. Small choices add up over a full set.
Start with these:
- Keep clusters dry for the first 24 hours after application
- Avoid oil-based makeup remover near the lash line while wearing clusters
- Brush lashes daily with a clean spoolie
- Never sleep face-down on your clusters
- Give your natural lashes a rest day between sets
Post-Removal Conditioning and Eyelid Hygiene
After removal, your natural lashes need a little recovery time. Clean the lash line gently each night with warm water and a soft cloth. This keeps the area free of residue and supports eyelid hygiene.
Common Mistakes to Avoid When Removing Lash Clusters
Most lash damage comes from a handful of repeat mistakes. Avoid these and your natural lashes will thank you.
- Pulling clusters off dry. No remover means the bond stays strong and your lashes pay the price.
- Skipping the soak time. Adhesive needs time to soften. Rushing this step causes tugging.
- Using water-based makeup remover. Water does not break down most lash adhesive. Oil does.
- Tugging near the lash line. This is the fastest route to follicle damage and thin spots.
- Reusing old remover pads. Dirty pads spread bacteria and irritate the eye.
- Ignoring irritation. Redness or stinging means stop, rinse, and reassess.
Frequently Asked Questions
Is it okay not to remove cluster lashes?
Leaving lash clusters on longer than recommended can cause adhesive buildup, irritation, and damage to your natural lashes. Most DIY cluster extensions are designed to be removed every 5 to 7 days. If you notice tugging, redness, or residue along the lash line, it is time to remove them. Sleeping in cluster lashes occasionally is fine, but daily wear without removal increases the risk of follicle damage and breakage.
What can I use as a substitute for lash remover?
If you do not have a dedicated adhesive solvent, oil-based cleanser, micellar water, or coconut oil can help loosen lash adhesive. Apply with a cotton pad or spoolie brush, let it sit for 30 to 60 seconds, then gently slide clusters downward. Olive oil works in a pinch. Avoid tugging or pulling; if the cluster does not move easily, add more oil and wait. Warm water and steam treatment before oil can make removal safer.
How do I prevent natural lash loss when removing clusters?
Preventing lash damage from clusters starts with a gentle removal routine. Never pull clusters off dry. Use a dissolving agent, soak time of at least 30 seconds, and a downward motion. Support the eyelid with one finger while sliding the cluster. After removal, clean the lash line with micellar water and a spoolie brush. Condition with a lash serum or lightweight oil. Avoid waterproof makeup remover, which can be too harsh.
How often should I remove and replace my DIY lash clusters?
For most DIY extensions, remove and replace clusters every 5 to 7 days. If you use bond and seal, you may extend wear to 10 days, but check for lifting and residue buildup. Remove sooner if you feel eye sensitivity, see redness, or notice adhesive clumps. Regular removal prevents follicle damage and keeps natural lashes healthy. Always follow the adhesive manufacturer's recommended wear time.
Removing lash clusters safely is a skill, and like any skill, it gets easier with the right guidance. If you are tired of guessing which remover to buy or how long to soak, Lash Girl USA can help. Our step-by-step tutorials, beginner-friendly lash mapping guides, and honest product breakdowns make every stage of DIY lashes simpler. Browse Tutorials at Lash Girl USA and learn to remove your clusters with confidence, protect your natural lashes, and keep your look fresh between sets.