 blog
blog
Beginner-Friendly Lash Cluster Starter Kits
Table of Contents
- What Is a Lash Cluster Kit and Why Beginners Choose Them
- Essential Tools and Components in a Beginner Lash Cluster Starter Kit
- How to Apply Lash Clusters for Beginners: Step-by-Step
- Lash Mapping for Beginners: Finding Your Best Look
- DIY Lash Extension Kit Retention Tips That Actually Work
- Safety, Sensitivity, and Proper Removal Techniques
- Common Mistakes Beginners Make and How to Avoid Them
- Frequently Asked Questions
Last Updated: September 29, 2026
What Is a Lash Cluster Kit and Why Beginners Choose Them
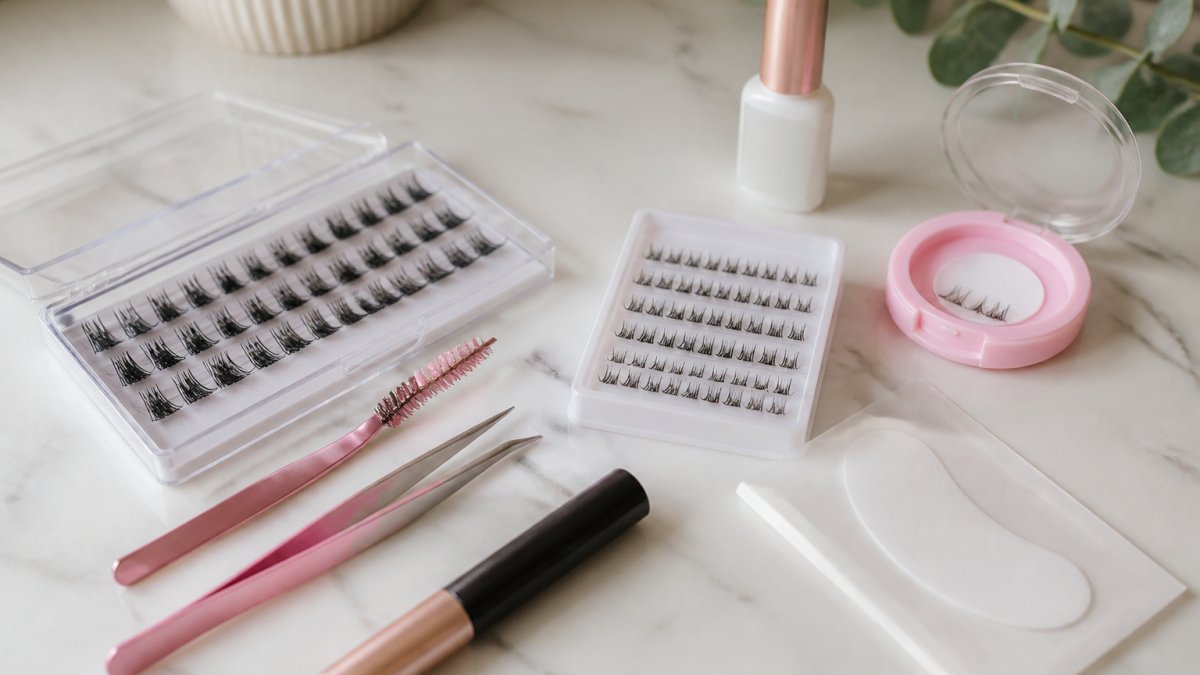
Lash cluster starter kits are collections of DIY lash extension tools and materials designed to help you apply false lashes at home without professional training. These kits bundle everything you need: pre-made lash clusters (small groups of synthetic lashes fused together), adhesive, application tweezers, and removal tools. Beginners gravitate toward lash cluster kits because they're more forgiving than individual lash extensions and deliver salon-quality results in minutes.
The appeal is straightforward. Lash clusters are thicker and easier to grip than single lashes, so your hands don't need a surgeon's steadiness. The application process takes 15-30 minutes, saving time compared to salon visits. You save money by skipping repeated appointments, and you maintain full control over which lash style suits your eye shape and preferences.
Many people worry that DIY means lower quality. The reality is different. When you use the right technique and quality materials, lash clusters can last 7-10 days with proper care. The cost savings add up quickly over a year.
Essential Tools and Components in a Beginner Lash Cluster Starter Kit
Every quality lash cluster starter kit contains the same core components, though quality varies. Understanding what each piece does helps you evaluate whether a kit is actually beginner-friendly or just budget-friendly.
Lash clusters are the main product. These are small bundles of 3-5 synthetic lashes pre-glued together at the base. Starter kits typically include clusters in lengths ranging from 8mm to 14mm. The longer clusters create drama; shorter ones look natural. A beginner kit should offer at least two different lengths so you can experiment.
Adhesive is non-negotiable. Look for formaldehyde-free, hypoallergenic options because your eyes are sensitive. Cheap adhesive takes forever to set or never fully bonds, which is why clusters fall off within hours.
Application tweezers let you pick up and position clusters precisely. You need tweezers with a slight curve at the tip, not straight ones. Straight tweezers are harder to control when you're working near your eye.
Lash removal solution is essential because improper removal damages your natural lashes. A good removal solution dissolves the adhesive bond without requiring you to pull. Oil-based cleansers work, but dedicated lash removal solutions are gentler.
Lash tray or organizer keeps clusters sorted by length and style. This seems minor until you're mid-application and can't find the right cluster size.
The best kits skip filler items (like fake "pro" tools you'll never use) and focus on these essentials in quality versions. Avoid kits that promise everything, they usually deliver nothing well.
How to Apply Lash Clusters for Beginners: Step-by-Step
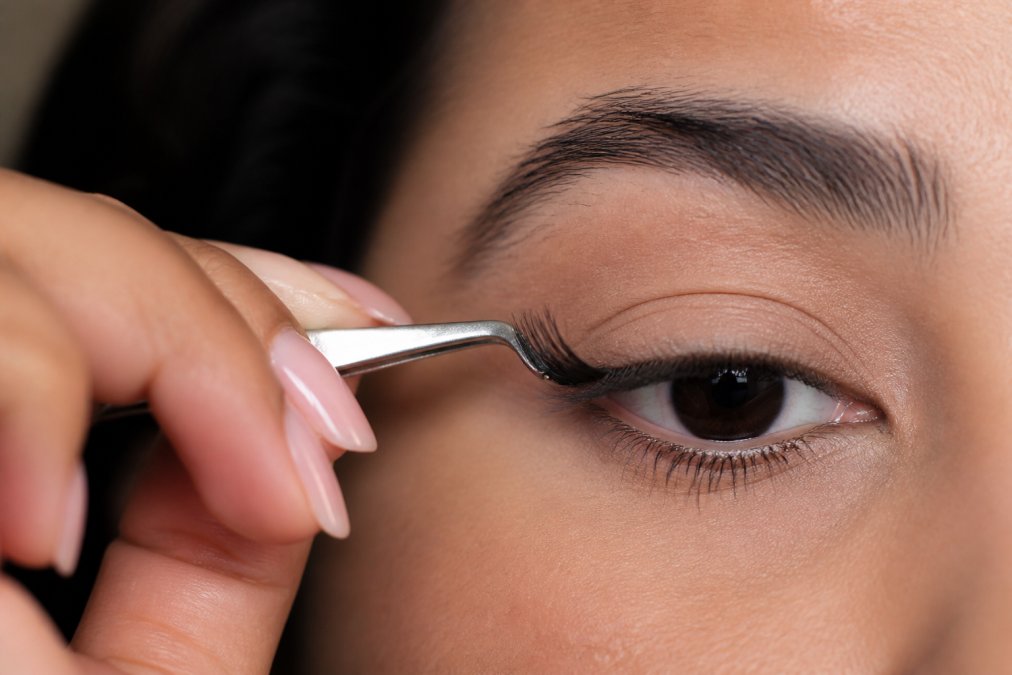
The application process is learnable. Most beginners nail the technique within 2-3 tries. The key is working slowly and following the same steps every time.
Step 1: Prep your natural lashes. Wash your face and wait 10 minutes. Your natural lashes need to be clean and completely dry. Any oil or moisture prevents the adhesive from bonding. Use a lash comb or clean spoolie to brush your lashes upward so they're separated and ready to receive clusters.
Step 2: Apply a small dot of adhesive. Squeeze a tiny amount of adhesive onto a clean surface (a tile, glass plate, or adhesive palette). The dot should be the size of a grain of rice. Too much adhesive creates a mess and takes longer to cure. Too little and the cluster won't hold.
Step 3: Pick up a cluster with your tweezers. Gently grasp the cluster base (the thick part where the lashes are fused) with your curved tweezers. Never grab the lash fibers themselves, you'll damage them.
Step 4: Dip the base into adhesive. Touch the cluster base to the adhesive dot. You want a thin coat, not a blob. The adhesive should coat the entire base.
Step 5: Position the cluster on your lash line. This is where precision matters. Hold your eye open with one hand and use your tweezers to place the cluster as close to your natural lash line as possible. Angle the cluster at roughly 45 degrees, matching the angle of your natural lashes. Press gently for 10-15 seconds while the adhesive sets.
Step 6: Repeat across your lash line. Work from the inner corner outward. Space clusters about 2-3mm apart. This spacing prevents them from clumping together.
Step 7: Wait 24 hours before getting wet. The adhesive needs full curing time. Avoid water, steam, and humidity during this period. After 24 hours, your lashes are fully set and you can shower, swim, and style normally.
The whole process takes 20-30 minutes once you're comfortable.
Lash Mapping for Beginners: Finding Your Best Look
Lash mapping is the practice of planning where clusters go on your lash line based on your eye shape. This is where lash mapping differs from generic tutorials, it accounts for the fact that your eyes are unique.
Your eye shape determines which clusters work best. Hooded eyes benefit from clusters placed higher on the lash line to peek out from under the hood. Almond-shaped eyes can handle clusters across the entire line for balanced drama. Round eyes look wider when you place longer clusters at the outer corners. Monolid eyes need clusters positioned to create definition where the lid naturally folds.
How to map your lashes: Take a selfie straight-on in natural light. Look at where your eye opens and closes. The inner corner (closest to your nose) should have shorter clusters, 8mm or 9mm works well. The center of your eye can handle medium clusters, 10mm or 11mm. The outer corner is where you place your longest clusters, 12mm to 14mm, to create a subtle lift.
This graduated approach creates a natural-looking result. Beginners who place the same length cluster all the way across their lash line end up with a flat, obvious look that reads as "fake lashes."
If you have hooded eyes, move all clusters slightly higher on the lash line so they're visible when your eyes are open. If you have a small eye area, use fewer clusters overall and skip the longest lengths.
DIY Lash Extension Kit Retention Tips That Actually Work
Retention is the challenge most beginners face. Your lash clusters fall out early because of one of three mistakes: poor adhesive application, moisture exposure too soon, or not following proper maintenance.
Adhesive application matters most. The adhesive bond fails when the base of the cluster doesn't make full contact with your lash line. If you apply adhesive too thickly, it takes longer to cure and the cluster shifts before it sets. If you apply it too thinly, the bond is weak. The right amount is a thin, even coat covering the entire cluster base.
Avoid moisture for 24 hours. This is the most common retention killer. Your adhesive needs full curing time. Shower steam, swimming, sweating during exercise, or even crying during a movie can weaken the bond.
Safety, Sensitivity, and Proper Removal Techniques
Eye sensitivity is a legitimate concern. Your eyes are delicate, and lash adhesive is a chemical product. The right precautions keep you safe.
Common Mistakes Beginners Make and How to Avoid Them
Knowing what goes wrong helps you sidestep these pitfalls.
Mistake 1: Using too much adhesive. Beginners think more adhesive means stronger hold. The opposite is true. Excess adhesive takes longer to cure, shifts the cluster position, and creates a visible mess. A grain-of-rice amount is all you need.
Frequently Asked Questions
What do I need to start doing lash clusters as a complete beginner?
A beginner lash cluster starter kit includes lash clusters, hypoallergenic adhesive, application tweezers, a lash remover, and cleaning tools. Beyond the kit, you'll need good lighting, a mirror, and steady hands. Many beginners also benefit from a lash mapping guide specific to their eye shape to ensure proper placement. Start with a quality formaldehyde-free adhesive to minimize sensitivity, and always perform a patch test 24 hours before full application to check for allergic reactions.
How long do DIY lash clusters typically last if I follow proper retention tips?
With correct application and maintenance, lash clusters can last for an extended period. Longevity depends on your natural lash cycle, adhesive quality, and how well you follow maintenance routines. Avoid oil-based products near the lash line, don't pull or tug on clusters, and keep them clean. Poor retention often signals weak adhesive bonding or improper application technique, our step-by-step guides address these common issues so your clusters stay secure longer.
Are lash clusters damaging to my natural lashes if I apply and remove them correctly?
When applied and removed properly, lash clusters pose minimal risk to natural lash health. The key is using a gentle oil-based cleanser or proper lash remover during removal, never pull or force clusters off. Beginners often worry about damage during removal, but detailed removal instructions prevent you from yanking out your real lashes. Allow the adhesive to break down fully before gently sliding clusters away. Give your natural lashes a break between applications to maintain their strength and health.
How do I know if a lash cluster starter kit is truly beginner-friendly?
Look for kits that include clear, jargon-free application instructions, quality tweezers with a comfortable grip, and hypoallergenic, formaldehyde-free adhesive. Beginner-friendly kits come with lash mapping guides for different eye shapes and address common mistakes upfront. The best starter kits also include detailed removal instructions and maintenance tips. Avoid kits that assume prior experience or use confusing beauty terminology. Our guides break down every step so you feel confident, not intimidated, from your first application.