 blog
blog
Best Lash Clusters for Hooded Eyes: 2026 Guide
Table of Contents
- Why Lash Clusters Work for Hooded Eyes
- Lash Mapping for Hooded Eyes: Open Up Your Gaze
- C Curl vs D Curl for Hooded Eyes: Which Lifts Better?
- Best Lash Cluster Styles for Hooded Eyes
- How to Apply Lash Clusters for Beginners: Step-by-Step
- Safety First: Adhesive Sensitivity and Removal for Sensitive Eyes
- Glasses and Hooded Eyes: Making Lash Clusters Work
- Conclusion
- Frequently Asked Questions
Last Updated: September 27, 2026
Why Lash Clusters Work for Hooded Eyes
Hooded eyes hide part of the eyelid under a fold of skin, which flattens the lash line and makes most strip lashes look heavy or disappear entirely. Lash clusters solve that problem because you control placement segment by segment.
Lash Mapping for Hooded Eyes: Open Up Your Gaze
Lash mapping for hooded eyes means assigning a specific length and curl to each segment of the lash line so the visible lid space reads larger when your eye is open. The goal is not "longer lashes", it's redirecting weight and attention away from the fold that covers your lid.
Why the Standard Map Fails on a Hood
On a non-hooded eye, the lash line sits on a flat, visible lid. On a hooded eye, the fold overlaps the lash line, so any cluster that is too long or too heavy in the middle pushes the fold down and makes the eye look smaller, not bigger. That's why the classic "longest in the center" open-eye map backfires on a heavy hood.
The Hooded-Eye Map, Segment by Segment
Divide the lash line into five zones from inner corner to outer corner and assign lengths like this:
- Zone 1 (inner corner): 8-9 mm, C-curl, keeps the inner corner light so it doesn't drag the fold
- Zone 2 (inner-mid): 9-10 mm, C-curl, a gentle step up, no jump
- Zone 3 (center): 10-11 mm, C- or CC-curl, deliberately restrained; this is where most people over-lash
- Zone 4 (outer-mid): 11-13 mm, D-curl, the lift begins here
- Zone 5 (outer corner): 12-14 mm, D-curl, the longest point, placed at or just past the outer third
Adjusting the Map for Hood Weight
- Light hood: shift the longest point to Zone 4-5 and keep the center at 10-11 mm.
- Medium hood: keep Zones 1-3 at 8-10 mm and push all length into Zones 4-5.
- Heavy hood: drop every zone by 1 mm and move the longest point as far outward as the lash line allows. If the outer corner is short, use a 12 mm D-curl rather than forcing a 14 mm.
Adjusting the Map for Glasses
If frames sit close to the eye, cap the longest cluster at 12 mm and keep D-curl on Zones 4-5 so lashes lift up and back instead of forward into the lens. Test by blinking slowly in front of a mirror, if lashes brush the lens, drop one length step across Zones 4-5.
Cat Eye vs. Open Eye on a Hood
- Cat eye map: longest at the outer corner, shortest at the inner. Best for rounder hooded eyes that need outward elongation.
- Open eye map: longest in the center. On a hooded eye this only works if the center length stays within 1 mm of the outer length, otherwise the hood wins.
- Doll eye map: even lengths across the line. Rarely flattering on a heavy hood because it adds uniform weight the fold can't support.
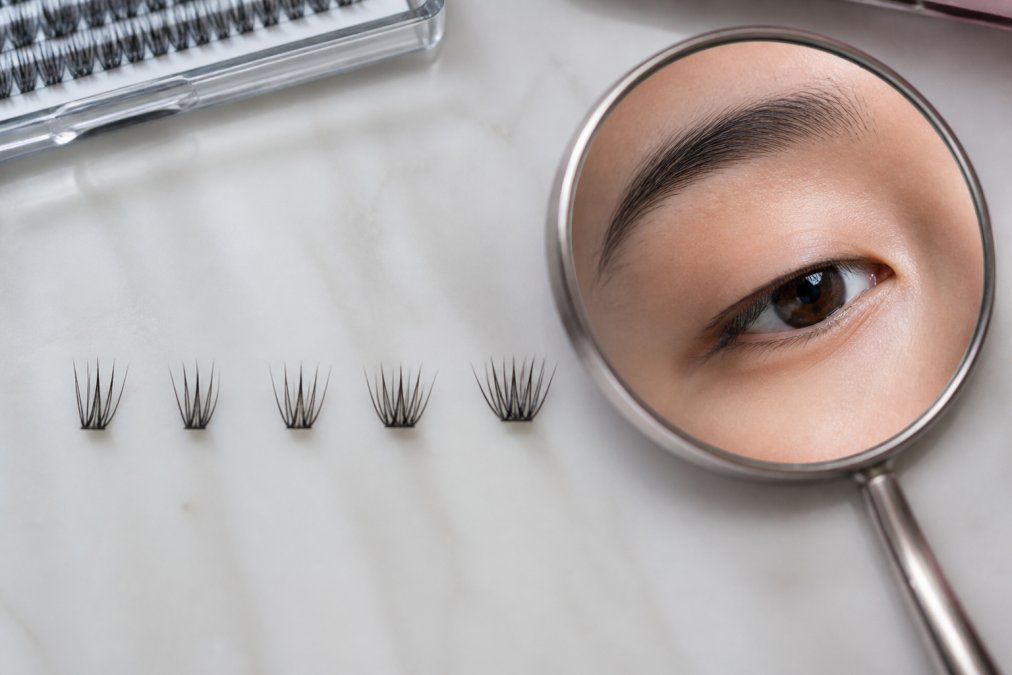
Reading Your Own Map Before You Apply
C Curl vs D Curl for Hooded Eyes: Which Lifts Better?
D-curl wins for most hooded eyes. The tighter curl lifts lashes away from the lid fold, so they stay visible when your eye is open. C-curl sits flatter and can vanish under a heavy hood.
Best Lash Cluster Styles for Hooded Eyes
Wispy clusters with tapered ends outperform uniform fans on hooded lids. Tapering spreads the lash weight, so the base doesn't press the hood down.
| Style | Best For | Effect |
|---|---|---|
| Wispy clusters, D-curl | Everyday lift | Natural, open |
| Cat eye map | Rounder hooded eyes | Outer corner lift |
| Open eye map | Heavy hood | Centers the gaze |
| Short C-curl set | Sensitive eyes | Subtle, light |
How to Apply Lash Clusters for Beginners: Step-by-Step
Applying lash clusters takes practice. Here's a common sequence:
- Clean lashes and let them dry fully.
- Curl natural lashes with a lash lift-style curl, not a clamp.
- Comb and separate with a clean spoolie.
- Map your lengths with a light dot of bond on the back of your hand.
- Pick up one cluster with tweezers at the base, never the tips.
- Dip the base in lash bond, wipe excess.
- Place under the natural lash, 1 mm from the waterline.
- Hold for three seconds, then move outward.
- Seal with a thin coat of sealant.
Safety First: Adhesive Sensitivity and Removal for Sensitive Eyes
Adhesive is where most DIY lash problems start, and hooded eyes carry extra risk that generic guides skip. When the fold of skin rests against or near the lash line, adhesive residue, fumes, and friction have more contact with skin than they do on an open lid. That's the mechanism behind most hooded-eye irritation, not the adhesive itself, but where it ends up.
Why Hooded Eyes Are More Sensitive to Adhesive
On an open lid, the lash line is exposed and adhesive cures in open air. On a hooded eye, the fold traps warmth and moisture against the lash line, which slows curing and keeps adhesive tacky longer. Tacky adhesive migrates. It reaches the skin at the base of the lashes, and that's where redness, itching, and swelling begin.
Patch Testing the Right Way
A wrist patch test is a starting point, not a guarantee. Adhesive that's fine on your wrist can still react at the lash line because the tissue there is thinner and more vascular. A more useful protocol:
- Apply one cluster to the outer corner of one eye only.
- Wait 24 hours.
- Check for redness at the base, itching, or a raised bump along the lash line, not just stinging during application.
- If clear, apply a full set. If not, remove immediately and switch adhesive formulas.
Habits That Cut Irritation Risk on a Hooded Eye
- Keep bond on the lash, never on the skin at the base
- Use the thinnest coat that still holds, excess adhesive is the main migration source
- Work in a ventilated room; fumes concentrate under a hood
- Avoid sleeping in a fresh set for the first night, when adhesive is still curing
- Skip oil-based products near the lash line for 24 hours after application
- Never re-dip a cluster that has touched skin back into the adhesive bottle
Removal for Sensitive Skin: The Slide-Off Method
Peeling is the number one cause of natural lash damage, and on a hooded eye it's worse because the fold hides the base where the cluster meets the natural lash, you can't see what you're pulling. Use this sequence instead:
- Saturate the base of one cluster with a dedicated lash adhesive remover. Use the applicator tip, not a cotton swab, so remover goes where it's needed and nowhere else.
- Wait a full 30 seconds. Do not rush this step, remover needs time to break the bond.
- Support the lid with one finger just above the lash line so the fold doesn't pull the skin.
- Slide the cluster down and away from the lash line with tweezers. If it resists, stop and add more remover.
- Work one cluster at a time, outer corner first, then inward.
- Cleanse the lash line with a gentle, oil-free cleanser and let it dry fully before any reapplication.
What to Do If a Reaction Starts
Stop application immediately. Remove clusters using the slide-off method. Rinse the lash line with cool water, avoid rubbing, and skip all eye makeup until the area settles. If redness, swelling, or itching persists beyond 24 hours, or if you notice any change in vision, see a healthcare professional, DIY lash adhesive reactions are not something to wait out.
Choosing a Gentler Adhesive
Glasses and Hooded Eyes: Making Lash Clusters Work
Glasses frames sit right where a long lash wants to go, so length discipline matters more here than anywhere else. Keep the longest cluster at 12 mm or under if your frames sit close to the eye. D-curl helps again, because the lift pulls lashes up and back rather than forward into the lens.
Conclusion
Hooded eyes aren't a barrier to great lash clusters. They're a mapping problem, and mapping is learnable in an afternoon. The right curl, the right length at each segment, and a clean removal routine will do more for your look than any single product.
Frequently Asked Questions
What lashes are best for hooded eyes?
For hooded eyes, the best lash clusters are those with an open-eye mapping, using C or D curl and lengths that increase toward the outer corner. Look for clusters with invisible bands and tapered ends to create lift without weight. Wispy or volume clusters in 8-12mm work well. Avoid heavy, uniform lengths that can droop and hide the lid. Always patch-test adhesive and choose lightweight synthetic fibers for comfort.
Is C curl or D curl better for hooded eyes?
D curl is often better for hooded eyes because its tighter curve lifts lashes away from the hood, creating a more open-eye effect. C curl provides a natural look but may not lift enough if your lids are very hooded. Many people use a mix: C curl on inner corners for a soft transition and D curl on the outer half for lift. Experiment with both to see which suits your eye shape and comfort.
How do you apply lash clusters to hooded eyes without them touching the lid?
To avoid clusters touching the lid, focus on careful placement. Start with the outer corner and work inward, keeping a small gap from the lid. Use a lightweight adhesive and avoid overloading. Practice with a mirror angled downward to see the placement clearly.
Can I wear lash clusters if I have sensitive eyes or wear glasses?
Yes, but choose sensitive-skin adhesive and do a patch test 24 hours before full application. For glasses wearers, keep lengths moderate to avoid rubbing against lenses. Remove clusters gently with a dedicated remover, never pull. If irritation occurs, discontinue use and consult an eye doctor. Proper application and removal protect your natural lashes and comfort.
Lash Girl USA publishes beginner-focused guides on DIY lash cluster application, mapping, and aftercare. Product recommendations are editorial and based on beginner suitability, not sponsorship.