 blog
blog
Best Lash Cluster Glue for Beginners
Table of Contents
- What to Look For in Lash Cluster Glue
- How to Apply Lash Clusters for Beginners
- Sensitive Eye Lash Glue: Safety First
- Lash Cluster Retention Hacks That Actually Work
- Lash Cluster Glue Removal Tips for Safe Takeoff
- Strip Lash Glue vs. Cluster Adhesive: Key Differences
- Common Mistakes Beginners Make With Lash Glue
- Frequently Asked Questions
Last Updated: September 25, 2026
What to Look For in Lash Cluster Glue
Choosing the right lash cluster glue is the foundation of successful DIY application. The best lash cluster glue for beginners balances retention, safety, and ease of use. The most common mistake is prioritizing retention over everything else, strong hold matters, but not if it causes irritation.
Evaluate lash cluster glue on three core qualities: bond strength, ingredient safety (formaldehyde-free and hypoallergenic), and application ease (clear drying time and proper wand design). Too-fast set times prevent repositioning; too-slow times allow shifting.
Choose medical-grade adhesive engineered for eye-area application with clear drying time guidance (usually 30-60 seconds) and minimal fumes.
How to Apply Lash Clusters for Beginners
Lash Mapping Basics
Lash mapping is planning where each cluster goes based on your eye shape, lid structure, and natural lash density. Skipping this step causes uneven placement and gaps.
Identify your eye shape and adjust placement accordingly: almond eyes benefit from even distribution; round eyes need heavier clusters at outer corners; hooded eyes need higher placement to peek through the fold; downturned eyes need lifting clusters at inner and center sections.
Assess your natural lash density by counting lashes per section with a clean spoolie. Apply one cluster for every 3-4 natural lashes to prevent over-clustering and damage.
Step-by-Step Application Process
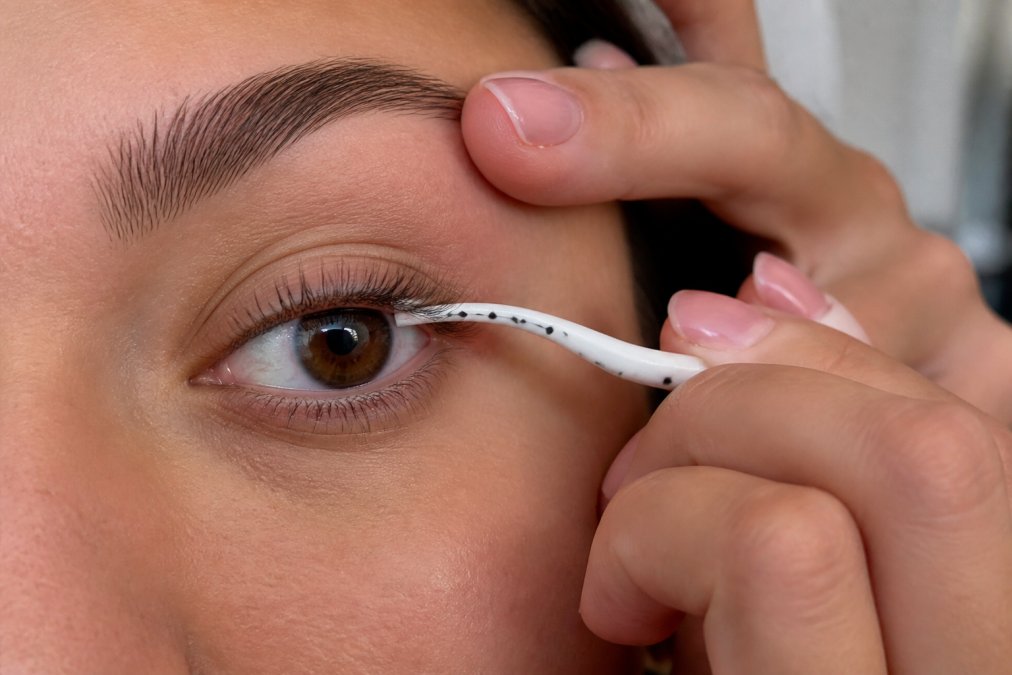
Step 1: Prep Your Natural Lashes (Time: 5 minutes)
Clean lashes with a lash cleanser or gentle makeup remover to remove oils, dirt, and residue. Oil breaks the adhesive bond, causing retention failure. Pat dry completely with a lint-free cloth.
Step 2: Apply a Lash Base or Primer (Time: 2 minutes)
A lash base improves retention and reduces skill required for proper placement. Apply a thin coat along your lash line and wait 30 seconds.
Step 3: Dispense and Position Your Adhesive (Time: 1 minute)
Place a lentil-sized dot of lash cluster glue on a clean surface. Dip your cluster at a 45-degree angle, coating only the base.
Step 4: Place the Cluster (Time: 2-3 minutes per cluster)
Position the cluster close to your lash line on top of 3-4 natural lashes. Press gently for 5-10 seconds. Avoid moving the cluster during setting.
Step 5: Allow Full Cure Time (Time: 24 hours)
Lash cluster glue reaches full strength after 24 hours. Wait a full day before exposing lashes to water, steam, or humidity.
Sensitive Eye Lash Glue: Safety First
Sensitive eyes require extra caution, but the right product and technique make DIY application manageable.
Choose hypoallergenic, formaldehyde-free, medical-grade adhesives. Formaldehyde causes redness, watering, and discomfort (Formaldehyde | Medical Management Guidelines | Toxic Substance Portal). Select latex-free options if you have latex sensitivity.
Apply adhesive only to the natural lash base, never to skin or waterline. If adhesive touches your eyelid, wipe immediately. Apply clusters with your eye looking downward to shield your eye opening from fumes.
Lash Cluster Retention Hacks That Actually Work
Poor retention is the most common complaint from beginners, and most of the time it's not the glue's fault, it's technique. Here are some retention hacks that can help.
Humidity Control During Application: Moisture interferes with adhesive bonding. Apply your clusters in a dry environment, ideally with a dehumidifier running if you live in a humid climate. Even shower steam from earlier in the day can reduce adhesion. Many beginners find their lashes hold better when they apply in the morning rather than evening, simply because bathroom humidity from showers is no longer present.
Proper Lash Isolation: Each cluster must bond to clean, isolated natural lashes. If natural lashes are clumped together or stuck to each other, the cluster won't have a solid base. Use a clean spoolie or lash comb to separate your natural lashes before application, and keep them separated while the adhesive sets.
Adequate Adhesive Quantity: There's a sweet spot between too little and too much. Too little adhesive means weak bonding; too much creates excess that seeps into your eye and weakens over time as it dries. A single small dot on your palette should provide enough adhesive for 5-8 clusters before you need to refresh it.
Oil-Free Aftercare: Oils break down the adhesive bond, which is why retention plummets if you use oil-based makeup removers or serums near your lashes. Stick to oil-free cleansers and avoid oil-based eye creams on the lash line. This single habit can help improve your lash retention.
Avoid Rubbing or Pulling: Beginners often unconsciously rub their eyes or play with their lashes, which weakens the bond. Be intentional about keeping your hands away from your lashes, especially during the first 24 hours when the adhesive is still curing.
Lash Cluster Glue Removal Tips for Safe Takeoff
Safe removal is just as important as proper application because improper removal can damage your natural lashes. Many beginners yank or peel their clusters off, which pulls out natural lashes along with them. The right removal technique helps protect your natural lash health.
Use a dedicated lash adhesive remover or a gentle oil-based cleanser specifically formulated for lash removal. Apply the remover generously along the cluster base and wait 30-60 seconds for it to break down the bond. The adhesive will soften and release naturally, if it doesn't, apply more remover and wait longer. Never force a cluster off before the adhesive has fully broken down.
Gently wiggle the cluster side-to-side while supporting your natural lash base with your other hand. This technique isolates the cluster from your natural lashes and prevents accidental pulling. Once the cluster releases, carefully peel it away from your lash line. The entire removal process should feel effortless, if you're experiencing resistance, the adhesive hasn't broken down enough yet.
After removing all clusters, cleanse your lash line thoroughly to remove any adhesive residue. Leftover adhesive can accumulate and weigh down your natural lashes. A gentle lash cleanser followed by lukewarm water completes the removal process.
Strip Lash Glue vs. Cluster Adhesive: Key Differences
Understanding how strip lash glue differs from cluster adhesive helps you choose the right product for your application method. The two aren't interchangeable, and using the wrong one leads to poor retention or damage.
Strip lash glue is formulated for full lash band application. It creates a strong, flexible bond across the entire width of the lash band and typically has a thicker consistency that's easier to control along a straight line. Strip adhesive often has a longer working time (60-90 seconds) because you're positioning a larger, heavier product that requires more adjustment time.
Cluster adhesive is engineered for precision application to individual or small groups of natural lashes. It has a thinner consistency and faster set time (30-60 seconds) because you're working with smaller, lighter clusters that need to bond quickly to prevent shifting. Cluster glue also typically offers better control with a precision applicator wand.
The key difference lies in flexibility and cure time.
| Characteristic | Strip Lash Glue | Cluster Adhesive |
|---|---|---|
| Consistency | Thicker, more viscous | Thinner, more precise |
| Set Time | 60-90 seconds | 30-60 seconds |
| Flexibility | Remains flexible after cure | Sets more rigidly |
| Best Application | Full lash band | Individual clusters |
| Adjustment Window | Longer | Shorter |
Common Mistakes Beginners Make With Lash Glue
Most beginner struggles aren't about the product quality, they're about technique. Recognizing these mistakes before you make them saves time, money, and frustration.
Mistake 1: Using Too Much Adhesive
Mistake 2: Applying Clusters to Wet or Oily Lashes
Mistake 3: Skipping the Patch Test
Mistake 4: Not Waiting for Full Cure Time
Mistake 5: Isolating Natural Lashes Incorrectly
Mistake 6: Removing Clusters Too Soon or Too Aggressively
Frequently Asked Questions
What is the best glue to use for eyelash clusters?
The best lash cluster glue for beginners should be formaldehyde-free, hypoallergenic, and have a drying time of 30-60 seconds. Look for medical-grade adhesives with strong bond strength and waterproof properties. Choose a sealant specifically designed for cluster lashes rather than strip lash glue, as cluster formulas offer better precision tip application and flexible hold. Always patch test first, especially if you have sensitive eyes.
How do you remove lash cluster glue safely without damaging natural lashes?
Use a dedicated lash cluster glue remover or oil-based cleanser to gently dissolve the bond. Apply the remover to the lash base and wait 2-3 minutes for the adhesive to soften. Gently wiggle clusters side-to-side using tweezers rather than pulling straight out. Never rush removal or force clusters off. After removal, cleanse your lash line thoroughly and apply a nourishing lash serum.
Is it safe to use lash cluster glue on your own eyes as a beginner?
Yes, if you follow proper safety protocols. Choose latex-free, cyanoacrylate-based adhesives that are specifically formulated for DIY use. Perform an allergy patch test 24 hours before application by applying a small amount to your inner elbow. Work in a well-ventilated area to minimize fume exposure. If you experience redness, itching, or discomfort, stop immediately and rinse with water. When in doubt, consult a professional before your first application.
How long should lash cluster glue last on natural lashes?
Quality cluster adhesive should provide good retention with proper application and maintenance. Retention time depends on the glue formula, your natural lash growth cycle, and how well you care for the clusters. Waterproof, oil-resistant formulas typically last longer than standard adhesives. Humidity and environmental factors can affect bond time, so keep clusters dry and avoid excessive moisture. Regular lash maintenance and touch-ups help extend longevity.