 ultimate-guide
Natural Looking DIY Lash Styles: A Beginner's Guide
Table of Contents
- What Makes Natural Looking DIY Lash Styles Different
- Lash Mapping for Beginners: Finding Your Perfect Style
- Best Lash Cluster Lengths for Natural Look
- Natural Lash Cluster Application Tools and Setup
- Step-by-Step Application Tutorial for Beginners
- DIY Lash Extension Retention Tips That Actually Work
- Troubleshooting Common Problems and Safe Removal
- Frequently Asked Questions
Last Updated: September 25, 2026
What Makes Natural Looking DIY Lash Styles Different
Natural looking DIY lash styles prioritize subtlety and dimension over dramatic volume. The difference between a DIY lash that looks professionally done and one that screams "I did this myself" comes down to three things: proper lash mapping, understanding your eye shape, and selecting cluster lengths that complement your natural lashes rather than overpower them.
Most beginners make the mistake of applying the same cluster length across the entire lash line. That's what creates that obvious, costume-like appearance. Professional-looking results come from varying your cluster lengths strategically, placing longer lashes at the outer corner and keeping inner corner clusters shorter and more delicate. This graduated approach is what separates DIY lashes that look intentional from those that look accidental.
Lash Mapping for Beginners: Finding Your Perfect Style
Lash mapping divides your lash line into zones to plan cluster placement. Without a map, you're guessing; with one, you're following a professional system.
Start by understanding the basic zones of your lash line. The inner corner (closest to your nose) should have the shortest, most delicate clusters. The middle section can gradually increase in length. The outer corner gets your longest clusters. This creates a natural eye-opening effect that makes your eyes appear larger without looking fake.
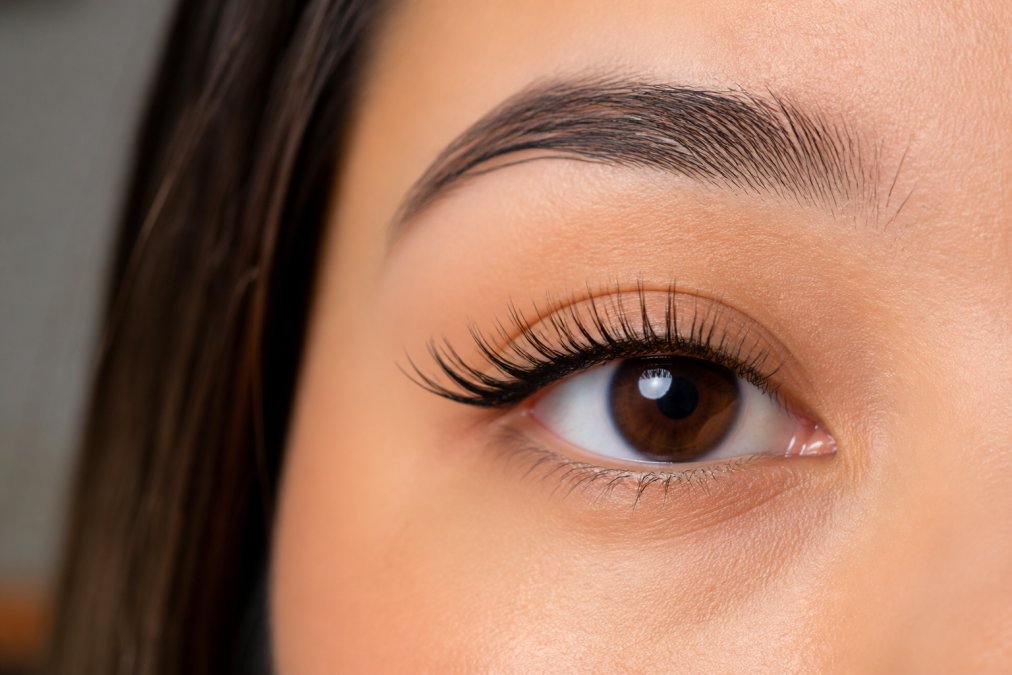
Your lash line curves, the inner corner sits lower than the outer corner. Clusters that ignore this curve sit at awkward angles and fall out faster. Mapping creates a contour that follows your eye's natural shape.
Mapping for Different Eye Shapes
Eye shape changes everything about how lash clusters sit and how long they last. Round eyes benefit from longer clusters at the outer corner to create a subtle cat-eye lift. Hooded eyes need clusters placed slightly higher on the lash line to be visible when your eyes are open. Almond-shaped eyes can handle more dramatic variation because the eye shape already creates natural dimension.
Small eyes need shorter, less dense clusters; thick lashes make them appear smaller by pulling the lash line down. Use medium-length inner corner clusters to open the eye without overwhelming it.
Wide-set eyes benefit from longer inner corner clusters; close-set eyes need longer outer corner clusters. These patterns work because they align with your natural eye structure.
Test one or two clusters before committing to a full set. Check placement with eyes open, closed, and looking in different directions to ensure they work for your eye anatomy.
Best Lash Cluster Lengths for Natural Look
Cluster length determines whether your natural looking DIY lash styles read as intentional or accidental. The standard range for natural styles is 8mm to 12mm, with strategic variation across the lash line. Anything longer than 14mm starts looking dramatic rather than natural, regardless of how carefully you place it.
Inner corner clusters should typically be 8-10mm. These short clusters sit close to your tear duct and create definition without weight. Middle section clusters can be 10-12mm, giving you a gradual increase in length. Outer corner clusters can reach 12-14mm for that subtle lift effect.
Beginners often buy single-length kits and apply the same length everywhere, creating an unnatural appearance. Natural looking DIY lash styles require at least three lengths: short, medium, and long.
Cluster volume matters as much as length. For natural looking DIY lash styles, aim for 25-40 lashes per cluster to create dimension without a heavy, costume-like appearance.
Natural Lash Cluster Application Tools and Setup
Proper tools are essential for natural looking DIY lash styles: tweezers, adhesive, and a good work surface.
Curved tweezers offer better control for outer corner placement than straight tweezers. Use fine-tipped tweezers that grip without damaging clusters; cheap tweezers slip and waste product.
Lash adhesive is non-negotiable. Using the wrong adhesive, or worse, using craft glue or eyelash glue meant for individual lashes, causes poor retention and potential eye irritation. Cluster adhesive is formulated to hold heavier weight and cure faster than individual lash adhesive. It also typically contains fewer irritants. The adhesive you choose directly impacts how long your natural looking DIY lash styles last.
Good lighting and magnification are essential, not luxury. A ring light and 5x-10x magnifying mirror transform placement precision and extend wear from two days to two weeks.
Lash bond and seal products extend wear time significantly. For retention issues, these are often the quickest fix.
Step-by-Step Application Tutorial for Beginners
The application process for natural looking DIY lash styles takes 30-45 minutes when you're starting out. Speed comes with practice. Here's the exact sequence that works:
Step 1: Prep Your Natural Lashes (5 minutes)
Clean your lash line with gentle cleanser and dry completely. Oil, makeup residue, or moisture prevents adhesive bonding. Use lash primer if you have oily eyelids. Skip this and clusters fall out within hours.
Step 2: Map Your Lash Line (5 minutes)
Mark three dots with white eyeliner: inner corner, middle, and outer corner. These anchor points prevent drifting and random placement.
Step 3: Apply Adhesive (2 minutes)
Place a small amount on a clean surface. Use just enough to coat the cluster base, too much creates mess and slow curing, too little causes poor adhesion. Use a toothpick or applicator brush for control.
Step 4: Place Inner Corner Clusters (8 minutes)
Start with shortest clusters (8-10mm). Dip base in adhesive, place perpendicular to lash line, press 10-15 seconds. Space 2-3mm apart to prevent clumping and create a natural, feathered appearance. Apply 3-5 clusters along the inner third.
Step 5: Place Middle Section Clusters (8 minutes)
Use medium-length clusters (10-12mm). The middle section gets the most clusters since natural lash density is highest here. Apply 4-6 clusters along the middle third with consistent spacing.
Step 6: Place Outer Corner Clusters (8 minutes)
Finish with longest clusters (12-14mm) at the outer corner for subtle lift. Apply 3-4 clusters along the outer third, spacing slightly further apart. Technique matters most here since longer clusters are more visible.
Step 7: Cure and Set (10 minutes)
Let the adhesive cure fully before opening your eyes or touching your lashes. Most cluster adhesives need 5-10 minutes of curing time.
Step 8: Final Check (2 minutes)
DIY Lash Extension Retention Tips That Actually Work
Poor retention defeats the purpose of natural looking DIY lash styles. Retention depends on prep, application technique, and aftercare.
Troubleshooting Common Problems and Safe Removal
Even with perfect technique, problems happen. Natural looking DIY lash styles sometimes fail, and knowing how to troubleshoot saves you from frustration and wasted product.
Clusters Falling Out Immediately (within 24 hours)
Clusters Falling Out After 3-5 Days
Uneven Appearance or Visible Gaps
Eye Irritation or Redness
Safe Removal Process
| Problem | Solution | Timeline |
|---|---|---|
| Clusters falling out within 24 hours | Improve lash prep, verify adhesive type, check cluster placement | Immediate |
| Poor retention after 3-5 days | Daily brushing, lash seal application, avoid touching lashes | Ongoing |
| Uneven appearance or gaps | Use white eyeliner guide, maintain consistent 2-3mm spacing | Next application |
| Eye irritation or redness | Replace old adhesive, ensure adhesive doesn't touch skin, try gentler formula | 1-2 applications |
| Difficulty with safe removal | Use dedicated lash remover or gentle oil, wait 15-30 seconds, never pull | Each removal |
Frequently Asked Questions
What type of lash clusters look most natural for DIY application?
Wispy lash styles with mixed lengths create the most natural look because they mimic how your real lashes grow at different lengths. Choose clusters with a natural curl (not overly dramatic), and select lengths between 8-14mm that match your natural lash length. The key is varying the density across your lash line, denser at the center, lighter at inner and outer corners. This approach gives you that soft, effortless appearance rather than the heavy, uniform look of dramatic falsies.
How do I know if lash clusters will work with my eye shape?
Lash mapping for beginners starts with understanding your eye shape. For almond-shaped eyes, you can use longer lengths at the outer corner. Hooded eyes benefit from clusters placed slightly higher on the lash line to remain visible. Round eyes look best with longer outer corner clusters to create lift. Small or deep-set eyes need careful placement to avoid irritation and ensure visibility. Sketch your eye shape and mark where you want clusters before applying, this prevents mistakes and ensures balanced, flattering placement.
Why do my DIY lash clusters fall out so quickly?
Poor retention usually comes down to three factors: insufficient bond and seal application, oily lash lines, and improper cluster placement. Make sure you're applying enough adhesive to the cluster base and sealing it properly after placement. Clean your natural lash line thoroughly before application to remove oils and makeup residue. Also check that clusters are positioned directly on the lash line, not floating above or below it. If you've had sensitivity issues before, do a patch test 24 hours ahead to rule out allergic reactions to the adhesive.
How long can I expect natural looking DIY lash styles to last?
With proper care, DIY lash clusters typically last 5-14 days before needing removal or replacement. Longevity depends on your lash growth cycle, how well you sealed them, and how gently you treat them. Avoid rubbing your eyes, sleeping face-down, and exposing them to excessive heat or moisture in the first 24 hours. Regular maintenance, gentle brushing with a clean spoolie and avoiding oil-based products near the lash line, extends wear time. Most people reapply clusters weekly or every two weeks depending on their natural lash shedding.