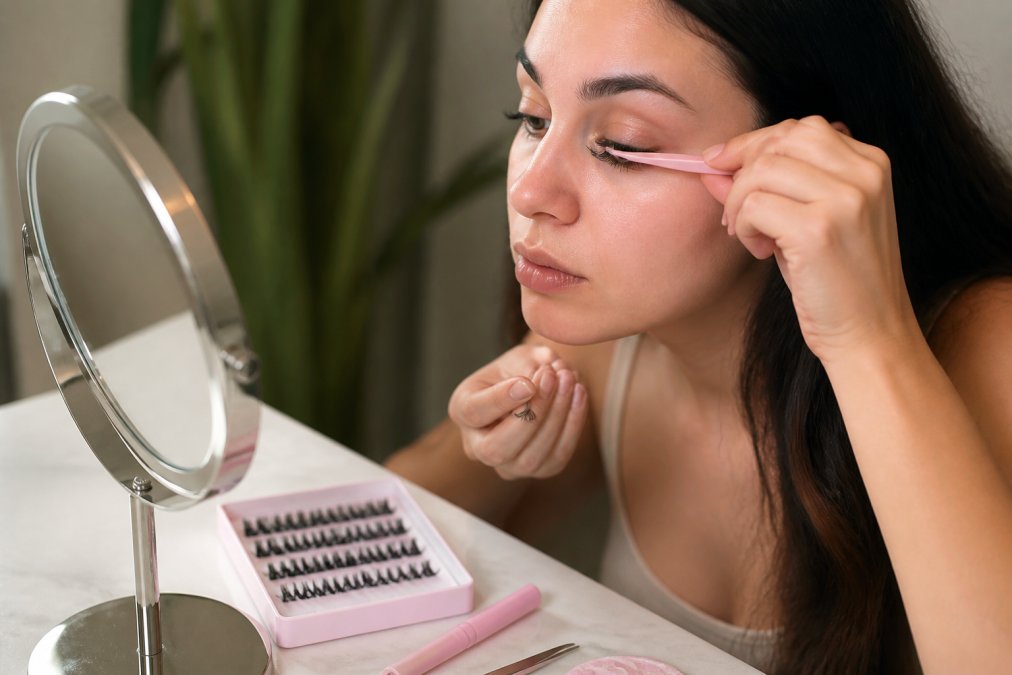
 ultimate-guide
How to Apply DIY Lash Clusters: Step-by-Step Guide
Table of Contents
- What You'll Need: Tools and Supplies for DIY Lash Clusters
- Step-by-Step Application: How to Apply DIY Lash Clusters
- Best Lash Cluster Adhesive for Beginners
- Lash Cluster Mapping for Hooded Eyes
- Troubleshooting Lash Cluster Retention
- How to Remove DIY Lash Clusters Safely
- Allergy Testing and Sanitization Protocols
- Frequently Asked Questions
Last Updated: September 23, 2026
What You'll Need: Tools and Supplies for DIY Lash Clusters
Learning how to apply DIY lash clusters starts with the right kit, not the right technique. Most beginners fail because they buy mismatched pieces: clusters that don't fit their eye shape, adhesive that cures too fast, and tweezers too blunt to place precisely.
Here's the short list of what a complete lash kit actually needs:
- Lash clusters in mixed lengths, typically 8mm to 14mm, so you can map a natural gradient
- Lash bond (the adhesive that grips the cluster to your natural lashes)
- Lash sealer (a thin coating applied after bonding to lock clusters in place)
- Applicator tool or precision tweezers for isolation and placement
- A clean spoolie brush to comb natural lashes before and after
- Oil-based cleanser or remover for safe removal later
Two items get skipped constantly: the sealer, which is why so many DIY sets shed within days, and a dedicated applicator. Fingers cannot place a cluster under the lash line without smearing bond across the lid.
At Lash Girl USA, we build our beginner tutorials around this exact kit list because missing supplies cause more retention failures than bad technique.
Step-by-Step Application: How to Apply DIY Lash Clusters
The process follows four phases: prep, bond, placement, and seal. Skipping or rushing any phase is the most common reason clusters slide off within 48 hours.
What separates a set that lasts two days from one that lasts a week isn't the brand on the box, it's whether you understand what each phase does to the adhesive. Bond needs a clean surface to grip, a tacky window to set, and a sealed edge to survive water and oil.
Preparing Your Natural Lashes
Clean, dry natural lashes are non-negotiable. Any oil, moisturizer, or makeup residue weakens the bond before you've even started. Lash adhesive polymerizes against a dry, slightly textured surface; oil creates a slick film the bond can't anchor to, which is why a set applied over yesterday's moisturizer often sheds within hours.
Wash your hands, cleanse the eye area with a mild oil-free cleanser, and pat dry. Comb through your natural lashes with a spoolie to separate them and remove loose particles. If you wear mascara, remove it completely the night before, residual mascara blocks bond.
Curl your natural lashes lightly if they point downward, a gentle curl gives the cluster a better base and helps the finished set blend. Skip the curler if your lashes are already lifted; over-curling pushes the natural lash into the cluster band and creates a kink that reads as a crimp.
A step most guides skip: check the humidity. Cyanoacrylate-based lash bonds cure faster in humid air and slower in dry air, so a steamy bathroom shrinks your working time while bone-dry winter air keeps bond wet longer than the label suggests.
Applying Clusters Under the Lash Line
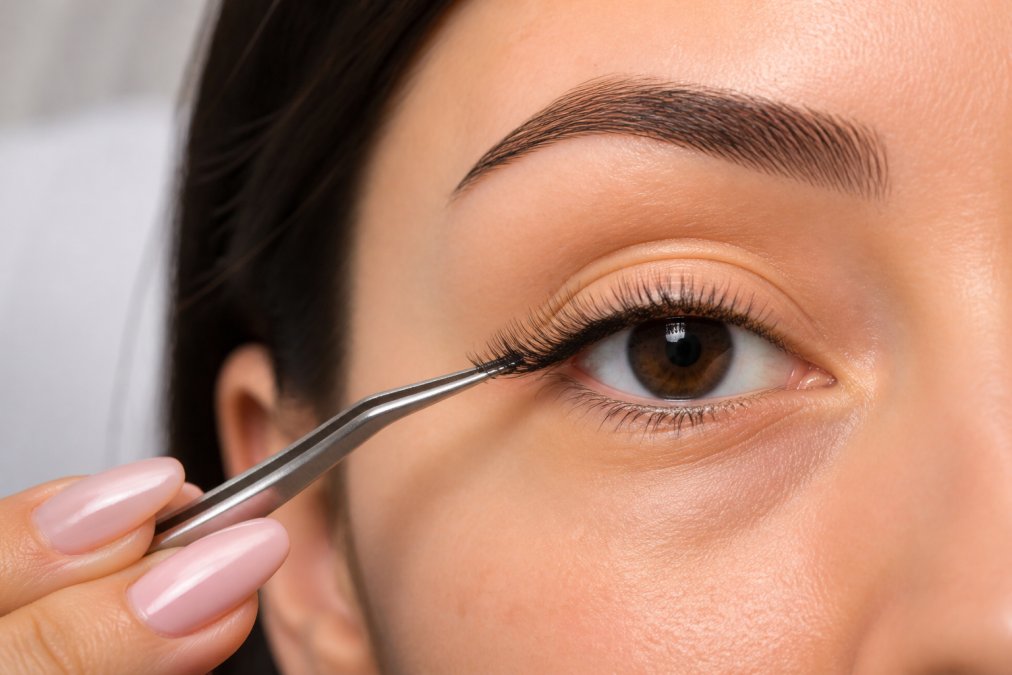
Under-lash application separates a salon-quality result from a visible, clumpy one. The cluster goes beneath your natural lashes, not on top. Placing clusters on top is faster, but it looks like a strip and pulls at the natural lashes.
Blending and Overlapping for a Seamless Look
A seamless blend comes from overlapping cluster bases, not spacing them evenly. Each new cluster should sit slightly over the previous one, bases touching but not stacked, stacking doubles the weight on one natural lash and shortens retention.
Best Lash Cluster Adhesive for Beginners
The best lash cluster adhesive for beginners is a low-fume, slow-curing bond paired with a separate sealer, not a fast-drying professional adhesive. Beginners need working time, and fast-cure formulas punish slow placement.
Look for three things on the label:
- Cure time of 5 to 10 seconds. Anything faster dries before you've positioned the cluster.
- Low fume or formaldehyde-free formulation. Fumes are the leading cause of the stinging sensation beginners report.
- A matching sealer from the same line. Bonds and sealers are formulated to work together; mixing brands often weakens retention.
Lash Cluster Mapping for Hooded Eyes
Lash cluster mapping for hooded eyes follows one rule: lift the outer corner and keep the inner corner short. Hooded lids fold over the lash line, so heavy inner-corner volume disappears when your eyes are open.
A practical map for hooded eyes looks like this:
| Zone | Cluster Length | Purpose |
|---|---|---|
| Inner corner | 8mm to 9mm | Prevents drooping, keeps the eye open |
| Mid-lid | 10mm to 11mm | Adds density without hiding the lid |
| Outer corner | 12mm to 14mm | Lifts and elongates the eye shape |
Troubleshooting Lash Cluster Retention
Poor retention is almost always one of four fixable problems, not a bad product. Work through this checklist before blaming the adhesive, most people who switch brands after a failed set repeat the same mistake with the new bottle.
- Clusters sliding within hours: Too much bond, or bond applied to the wrong part of the cluster. Use less and apply only to the base. Excess bond stays wet longer, so the cluster never enters the tacky window and drifts down the lash.
- Clusters popping off at the outer corner: Sleeping on your side. Try a silk pillowcase or sleep on your back for the first two nights. The outer corner takes the most friction against a pillowcase, and friction breaks the sealer film before it breaks the bond.
- Clusters sticking to each other: Not enough drying time between placements. Wait for each cluster to set before adding the next. If two clusters touch while the bond is still tacky, they fuse into a single clump that pulls at both natural lashes.
- Whole set shedding on day two: Missing sealer, or oil-based products touching the lash line. Keep moisturizers and cleansers away from the eyes. Sealer is the barrier that keeps oil from reaching the cured bond; without it, one face-wash can undo a perfect application.
Sanitization: The Step Nobody Talks About
Reusable clusters are a common source of eye irritation beginners misattribute to the adhesive. A cluster worn, removed, and stored without cleaning carries skin cells, oil, and bacteria back to the lash line.
A simple protocol that most guides skip entirely:
- Remove clusters gently using the oil-based method below, never by pulling.
- Soak clusters in isopropyl alcohol (70% or higher) for a few minutes to break down residual bond and sealer.
- Pick off softened adhesive with clean tweezers. Don't scrape the band, you'll fray the hairs.
- Rinse with clean water and lay clusters flat on a lint-free cloth to air-dry completely before storing.
- Store in a clean, closed container away from dust and humidity.
When to Stop and Reset
If you've tried less bond, more sealer, and a clean application surface and clusters still fall off within a day, the adhesive has likely degraded (heat, sunlight, or an expired batch) or your natural lashes are too coated to accept bond. The fix isn't more adhesive, it's a reset. Remove everything, give your natural lashes a rest day, clean your tools with isopropyl alcohol, and start fresh with a new bottle of bond.
How to Remove DIY Lash Clusters Safely
Safe removal protects your natural lashes, and it takes patience, not force. Never pull clusters off dry. Doing so takes your natural lashes with them and can leave thin patches that take weeks to recover.
The safe method uses an oil-based cleanser:
- Saturate a cotton pad with oil-based cleanser or a dedicated lash remover.
- Press it gently against the closed eye for 30 to 60 seconds.
- Let the adhesive soften. Do not rub.
- Use your applicator or clean fingers to slide clusters downward, away from the lash line.
- Cleanse the eye area and comb through your natural lashes.
Allergy Testing and Sanitization Protocols
Patch testing and clean tools prevent the two problems beginners fear most: irritation and infection. Both are avoidable with a few habits.
Frequently Asked Questions
Is it better to put cluster lashes on top or bottom?
For a natural look and to protect your natural lashes, always apply clusters underneath the lash line, not on top. Under-lash application hides the lash band and prevents pulling. Top placement can cause clumping and may damage natural lashes when removed. If you're new to DIY lash clusters, start with under-lash application for better retention and comfort.
How long do DIY lash clusters last?
With proper application and care, DIY lash clusters can last. Using a quality lash bond and sealer, avoiding oil-based products, and following correct removal steps will maximize wear time. If you experience poor retention, check your adhesive technique and ensure your natural lashes are clean before applying.
What do I use to put on lash clusters?
You'll need a lash bond (adhesive), a sealer, and a precision applicator tool or tweezers. Choose a beginner-friendly lash cluster adhesive that dries clear and flexible. Apply a thin coat of bond to your natural lashes, place clusters underneath, then seal to lock them in. Always do a patch test first to check for sensitivity.
How do I safely remove DIY lash clusters without damaging my natural lashes?
Never pull clusters off dry. Saturate a cotton pad with oil-based cleanser or a dedicated lash remover, close your eye, and hold it over lashes for 30 seconds. Gently wipe downward. The clusters should slide off. Clean any residue with a mild cleanser. This method prevents tugging and keeps your natural lashes intact.